Timeline
The timeline is populated with points-in-time when the Windows Explorer address
refers to a local fixed disk and that disk contains volume shadow copies. When
the address is not a local fixed disk TimeTraveler is not loaded.
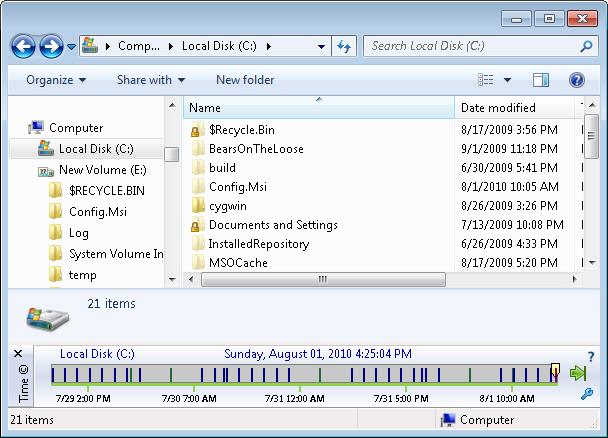
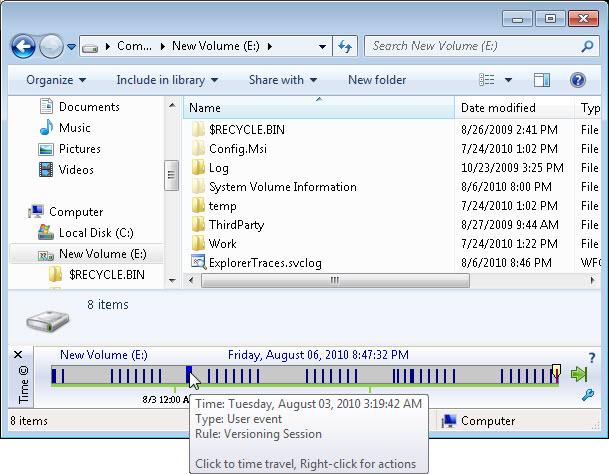
When the Windows Explorer address is the root of a file system it
is populated with all its points-in-time, each being a shadow copy.
TimeTraveler displays two types of shadow copies: restore-points (dark green)
and non-restore-points (dark blue). Restore points are shadow copies that can
be used to restore the system. TimeTraveler uses both both types but creates
only non-restore-point shadow copies. There is a good reason for this:
non-restore-points require less system resources to create. Figure 1 is an image
of a TimeTraveler showing the root of a file system. Notice that the Explorer
selection name displayed in the upper left of the timeline is for the volume and
contains the drive letter.
Figure 1: TimeTraveler with Windows Explorer address not set to a local and fixed disk
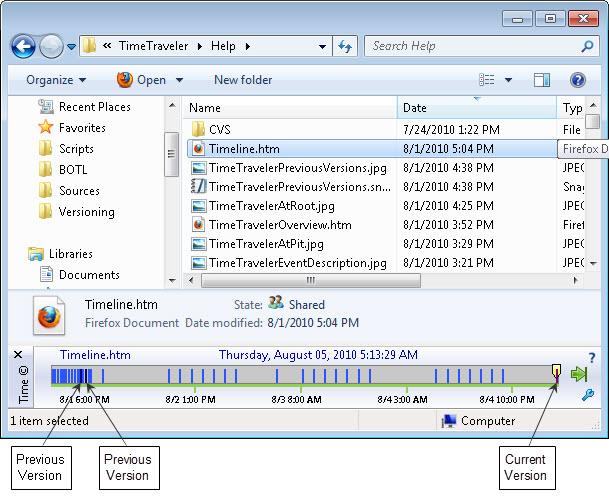
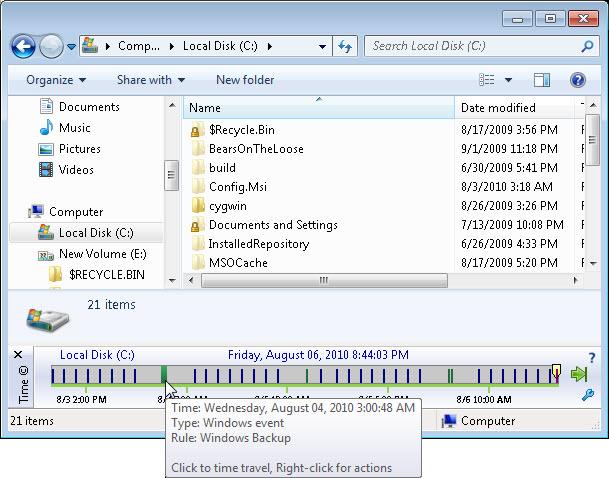
From here, if you select a file or a folder, TimeTraveler will indicate when the
selection was modified by changing the color of the points-in-time. Dark green
and blue means that there is a new version of the file at the point-in-time and
pale green or blue means that the selection has not changed. Remember that to
understand change, you must read the points-in-time from current time to the
earliest time or from right to left. The first dark point-in-time to the left
of the current time is the most recently changed version before the current
version. Figure 2 shows all the versions for the file Timeline.htm. Note that
the Windows Explorer Details Pane indicates that the file's "date modified" is
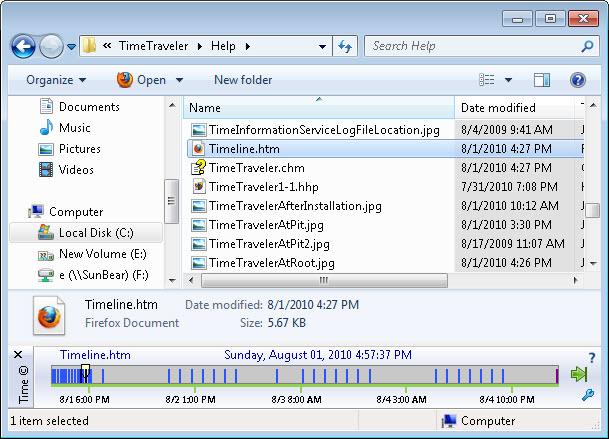
8/1/2010 5:04 PM. On Figure 3 we have moved the time cursor to the last
previous version and the "date modified" time is 8/1/2010 4:27 PM. Notice also
that the background behind Explorer's right side panel is gray to indicate that
a past time is being navigated. The pale-blue points-in-time to the left of
this point-in-time contain the same version of the file therefore their modified
times are also 8/1/2010 5:04 PM.
Figure 2: All available versions of the Timeline.htm
Figure 3: The last previous version modified time is 4:27 PM, 37 minutes prior to the current version
Timeline
Because the computation identifying the versions of the
points-in-time can be lengthy TimeTraveler performs it in the background. When
it is completed TimeTraveler displays the new colored points-in-time. This
means that you can still interact with Windows Explorer while this is going on.
If you happen to change the selection during a computation then TimeTraveler
will cancel it and start again with the new selection. The now button is
changed to a spinning wheel for the duration of the computation. You can still
click it to bring Windows Explorer to now.
To navigate to a point-in-time you can either use the mouse or the
keyboard. Using the mouse, you left-click the time marker. Using the
keyboard, click the left and right arrows to navigate between points-in-time
that are versions (the dark ones). Use Control with the arrow keys to navigate
between all points-in-time.
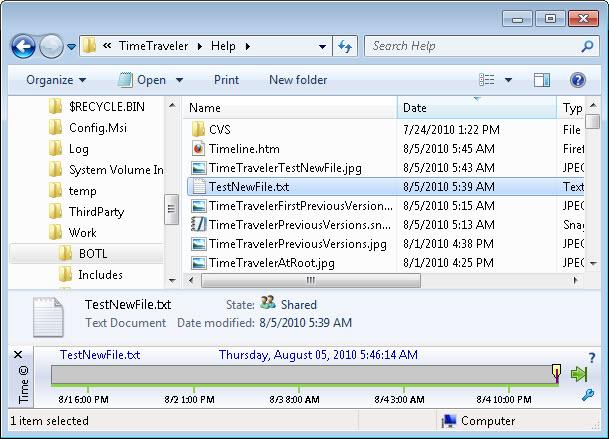
If the selection did not exist at a certain point-in-time,
TimeTraveler does not show these points-in-time for this selection. Look at
Figure 4 where we just created a new test file and selected it.
Figure 4: Points-in-time are not displayed because TestNewFile.txt did not exist at these prior times
Timeline
If you roll the mouse pointer over a point-in-time and keep the
pointer on the point for an instant, a tooltip will be displayed indicating the
point's date and time, the type of event that created it and some event
information. There are three types of events that can trigger the creation of
points-in-time. The first type is the "Windows" event type. They are triggered
by a modification to the system like the installation of a program, a system
checkpoint was scheduled or a backup was taken. Windows events always generate
restore points. The second type is the "schedule" type. A scheduled
point-in-time is created by TimeTraveler. This only happens when you configure
TimeTraveler to create points-in-time at regular intervals. The third event type
is user event type. For this type, TimeTraveler creates a point-in-time when
requested by the user or by the change tracking engine, also called the
versionning engine. Change tracking essentially allows the user to configure
TimeTraveler to create points-in-time based on file activity. It is explained in
details in the section Track Changes.
Figure 5: TimeTraveler showing the event information for a non-restore point
Figure 6: TimeTraveler showing the event information for a restore point
Timeline
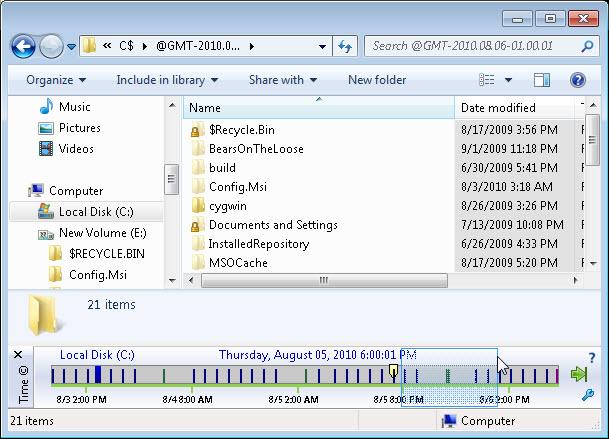
If you find the points-in-time are too close together to
distginguish, you can zoom in on any subsection of the timeline by selecting
that area. To do this, left click where you want to start, hold the mouse
button and drag the mouse where you want to stop. This will cause a blue and
transparent rectangle to appear and when you release the mouse button that area
of time will fill the timeline. See figure 7.
Figure 7: Zoom selection
Timeline
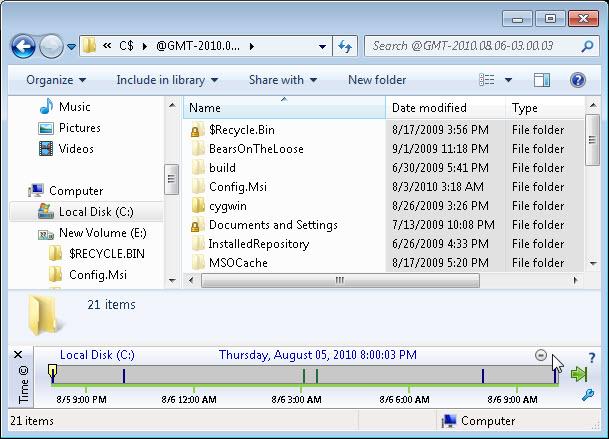
Figure 8 shows the zoomed in timeline. You further zoom in by repeating the
process as many times as you want. To zoom out, press the round button with a
minus sign in the top-right corner of the timeline.
Figure 9: Timeline zoomed in
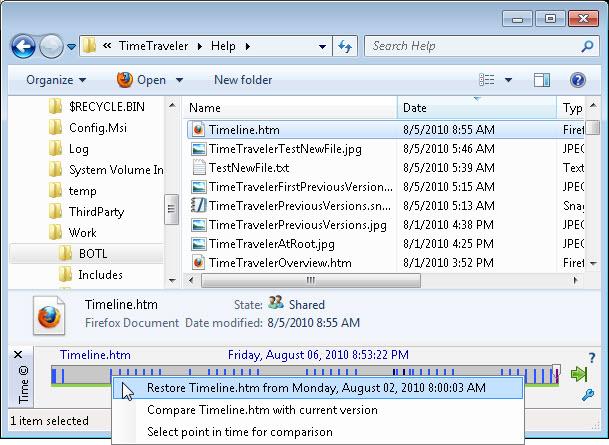
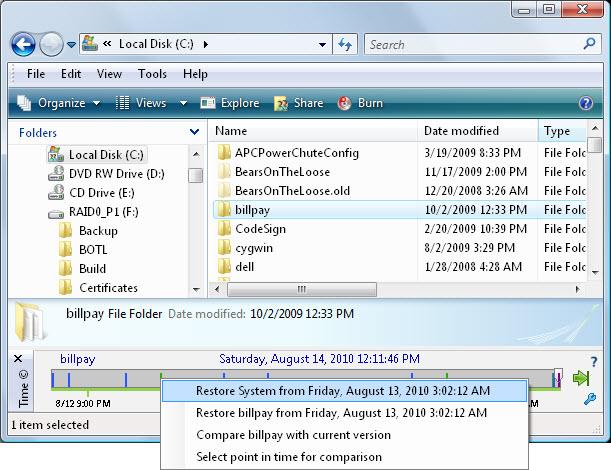
TimeTraveler provides other functionalities via its time marker context menu.
Right-click on any time marker and a menu will appear. For non-restore points
you can restore the Explorer selection, compare the version at the point-in-time
with the current version or select the point-in-time for comparison with another
point-in-time. See figure 10.
Figure 10: Context menu for a non-restore point
Timeline
For restore points, you can also restore your Windows machine to
the selected point-in-time. See figure 11. These functionalities are explained
in more detail in coming sections of this help file.